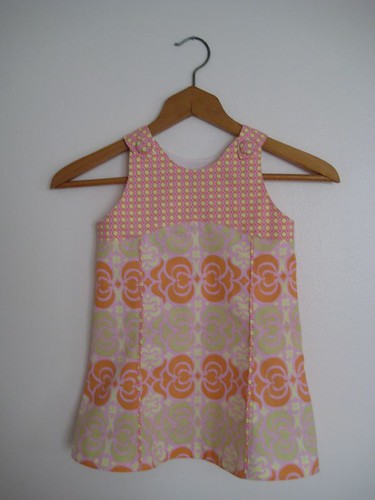
I just love the tea party dress from
Oliver + S. Such a sweet little dress couldn’t have been easier to put together and that just made me fall in love all over again.
At Elise’s suggestion I traced the pattern onto paper rather than cutting it out. Although it was tricky at times to ensure I was tracing the right line it was worth the extra step. Because the pattern wasn’t sacrificed for a single size, dresses can now be made for summers to come.
I did talk myself into cutting into some of
my Amy Butler
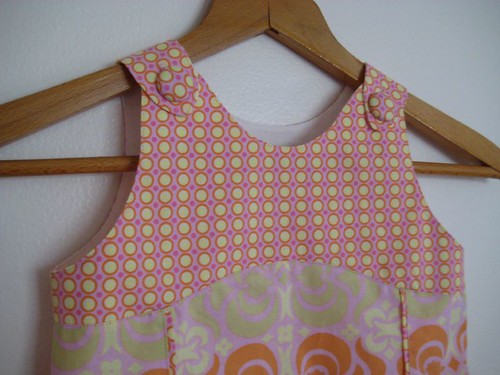
Midwest Modern fabric for this project. For the bodice I chose
Happy Dots Pink (AB29) while for the main panels I chose
Garden Maze Pink (AB23). I love this combination of pinks, yellow, green, and orange. It says girl without being too girly, just like its recipient.
The construction was smooth, apparently too smooth. I felt it necessary to add some challenge. While trimming the seams after I’d installed the piping along the dress front I cut into the fabric! Thankfully it was at the bottom of the dress and I just had to make a ¾” seam at the hem rather than a ½” seam.
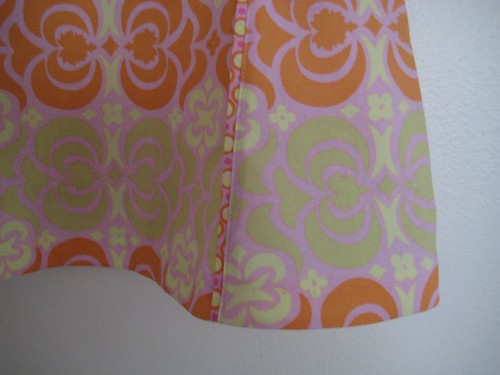
To finish the hem the pattern recommends hand stitching the hem facing to the dress. Frankly I’d had enough of hand stitching from doing the quilt binding. That was all the excuse I needed to try out the blind hem stitch on
my Bernina. I watched a
quick video to be sure I had the folds right, practiced with some scraps to get the stitch width perfect and in no time the hem was complete.
I think this dress is ready for a party. Tea anyone?


5 comments:
This is adorable! I have this pattern too and now I'll have to get it out. And thanks for the you tube link!! I never knew how to do that (or what that foot was for!) and now I know...and it led me to a bunch of other you tube how-to's.
Thi is a great dress, I love the fabrics you used! -kb
it's so beautiful!
Oh this is adorable!! I'm now itching to buy a couple of patterns and get to it.
I have cut the different sizes of patterns using newspaper. I pin the pattern to the newspaper, cut out the largest size first, then the next smaller one, and so on, until I have all the different sizes cut out. I use a marker to write the pattern piece numbers and sizes on , mark notches and dots, etc.
That way, if I want to make more than one, the pieces are already cut and ready to go.
Post a Comment